Shanel Wu
They/them. PhD student: smart textiles, weaving, computational craft, hardware hacking.
Baking Experiments, Second Half of July 2021
by S

I swear, I’m not turning this into a food blog. Making food has always been a restorative activity for me. Baking, in particular, has become a major fun activity in the past couple years. During the COVID-19 pandemic, most of my days off from work have been spent in baking marathons, since travelling wasn’t an option, and it’s really hard for me to think about work when I have some baking process to monitor or new recipe to research. The second half of this month, July 2021, was marked by a major paper deadline and my birthday, so I really needed to force a break on myself.
Cheesecake
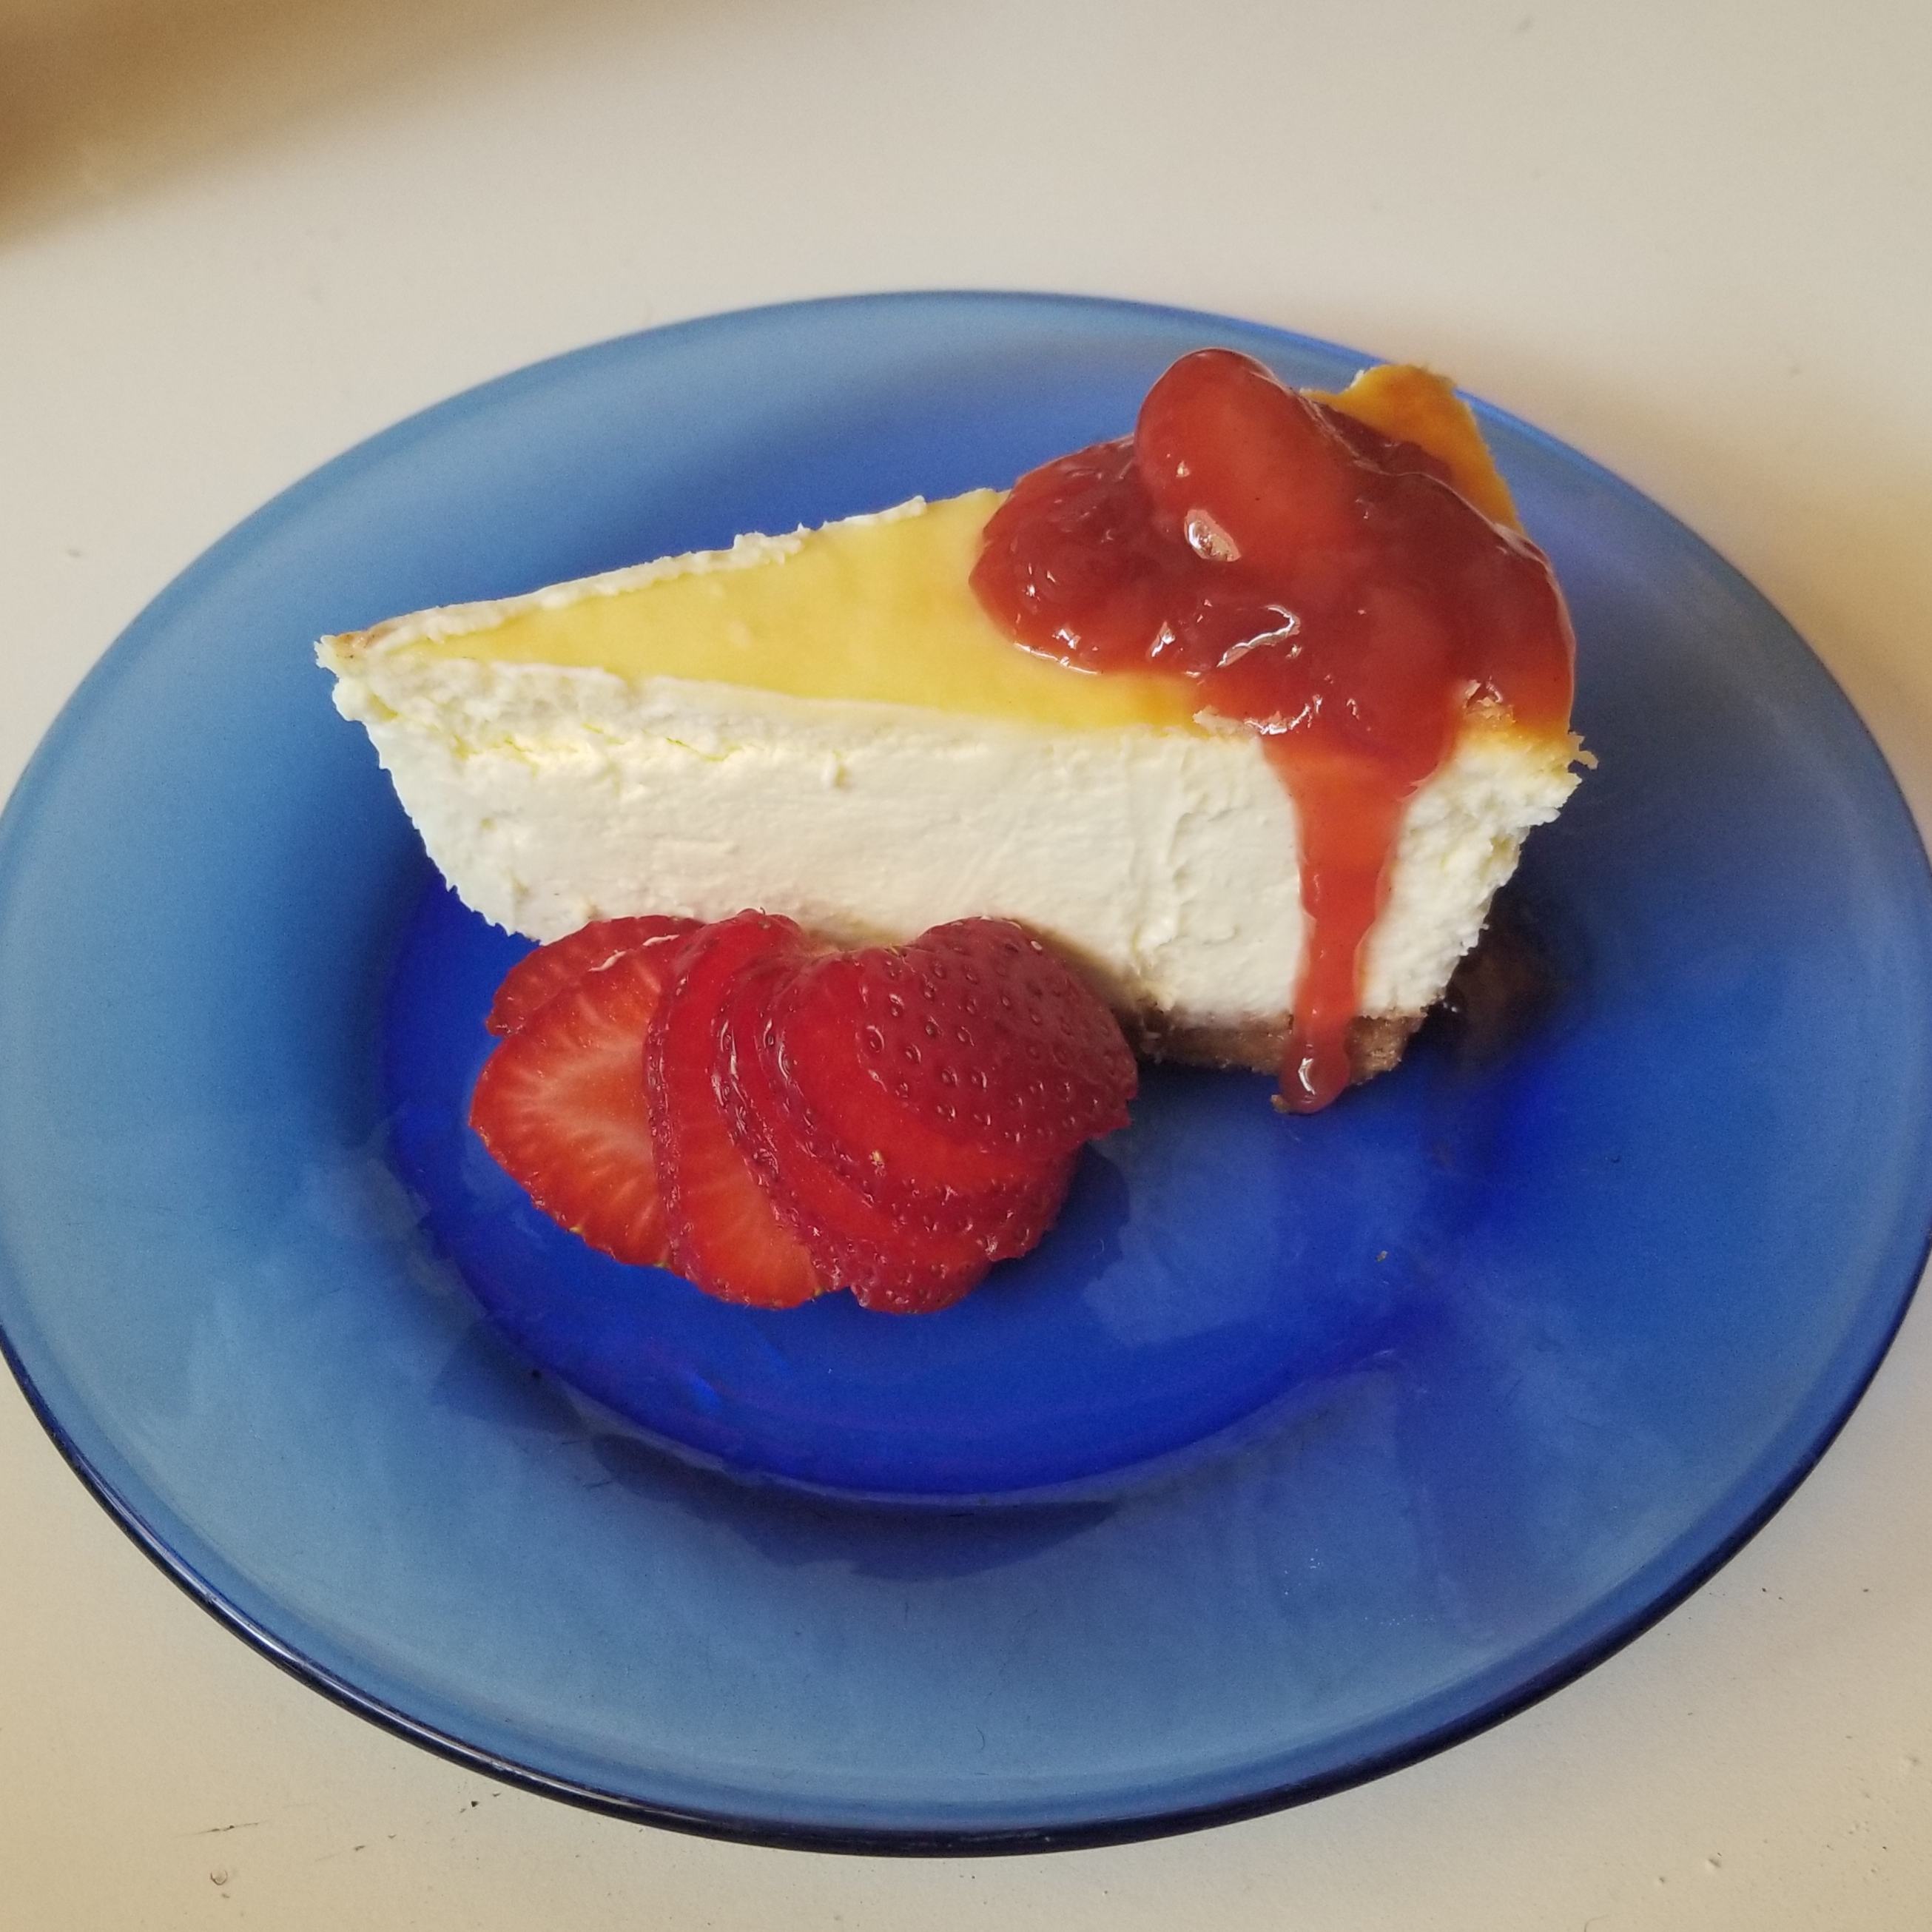
I’ve been floating the idea of a birthday cheesecake for months now, as a type of cake I’ve been wanting to make. I’m still scared of trying actual batter cake, but cheesecake seemed close enough to pie to be achievable. A friend randomly off-loaded a giant bag of sour cream onto our house, and I started wondering if sour cream was an ingredient in cheesecake. Turns out, yes!
When I’m trying out a new class of recipes, I do some research on the top Internet results and my go-to sources. Of the first few “basic” or “classic” cheesecake recipes I found:
Most of them had sour cream in the filling. Of the above links, only the King Arthur recipe doesn’t have sour cream. I ended up following Sally’s recipe alone because I trust her explanations (learned how to make an awesome pie crust from her blog). I do treat my baking and other culinary forays as experiments, lab notes and all, so I’ll go into some highlighted “findings” from my notes.
Graham Cracker Crust
I love this crust so much. I’m so happy that I now have another option for a dessert shell, since I only had pie crust up to this point. Sally has a recipe post just for the graham cracker crust for easy segmentation. I crushed the graham crackers manually using a drinking glass and mixing bowl as mortar and pestle. With only three ingredients (1.5 cups graham crackers / 5 tbsp butter / 0.25 cups sugar = a thick crust covering the bottom of a 9” pie tin), this will be easy to scale up or down for any quantity. Pardon my units, I haven’t converted them yet.
Filling
The most interesting thing about the filling was that the recipe specifies to bring the ingredients to room temperature: sour cream, cream cheese, and eggs. This kind of detailed explanation is why I like Sally’s recipes, because she not only tells you what to do, but why that is a helpful thing to do. (as a note for anyone who needs to tell me to do something) Room temperature, rather than cold, filling ingredients will mix more easily and more smoothly without chunks.
Baking with a Water Bath
Out of all the new things in this baking procedure, the water bath stood out to me. When I was talking about my cheesecake idea to friends before, the most common complaint they had from their own experiments was that their cheesecake always cracked. According to this recipe, there are several possible safeguards to cracking, the water bath being one of them.
Because cheesecake filling is so soft and porous, both dryness and sudden temperature changes can cause it to collapse or crack. That’s my understanding of the physics here. A water bath during baking not only contributes lots of steam in the oven to prevent things from drying out, but also the high specific heat of water helps to heat the cheesecake gradually and evenly. Yeah, look at my thermodynamics education paying off! To set up the water bath, I used a pyrex roasting pan that was big enough for the pie tin I used for the cheesecake, and filled it 1” deep with boiling water before putting the entire apparatus in the oven.
Other Notes
- Got the other ingredients in bulk through COSTCO, my friends. I did not realize a bulk package of cream cheese would come in a giant, 3-pound log.
- I made a (straw)berry sauce starting with leftover fruit syrup from making pie. The syrup had solidified into gel because of the corn starch, so I added some water and reheated it to re-liquefy. I had a burst of spontaneous genius and added a splash of rosé.
Fruit Tart
I loved the graham cracker crust from the cheesecake so much, I started looking up other excuses to make something else with the crust. One of my roommates is lactose-intolerant, so I decided on a fresh fruit tart with a dairy-free custard base because the cheesecake was such a dangerous temptation for their digestive system.
The two recipes that I referenced for the custard:
Dairy-Free Custard Thickener
Unlike the cheesecake, I ended up synthesizing both recipes to work with the ingredients I had. I had a can of full-fat coconut milk, and we aren’t vegan, so we could use eggs like the WTFork recipe. But because our house exclusively uses our flock’s fresh eggs, I didn’t want to use 5 whole eggs just for a dessert tart.
I looked to the vegan recipe for how it thickened the custard without eggs, which was with corn starch. Both recipes use some amount of cornstarch, but the vegan one explained how it varied the amount of cornstarch to adjust consistency. If I wanted to use fewer eggs, I would have to increase the amount of cornstarch – but by how much? While the vegan recipe doesn’t indicate the number of servings it yields, it used about 50% more volume of coconut milk than the WTFork recipe (milk + coconut cream vs. full-fat milk), so even after reduction from simmering, it would likely yield more custard. However, it is written for a more runny consistency (even with the maximum amount of cornstarch), so I figured that if I used its maximum amount of cornstarch, I would get an appropriately thick custard. And if it ended up too thick, I could add reduced-fat coconut milk like the vegan recipe did. So I ended up using two egg yolks and 1/3 cup of cornstarch.
In terms of the cooking process, I mostly followed the WTFork recipe up to step 4, using 1/3 cup of sugar as it called for.
Custard Flavoring (and Color)
We have a lot of fruit around the house. I knew I was going to top the tart with fresh fruit, but why not flavor the custard with fruit as well? I pureed some berries and strained the puree (grinding them even more finely with a whisk in the strainer) into the custard as it heated on the stovetop (step #4 of WTFork recipe). I only added a teaspoon of vanilla extract, borrowing from the vegan recipe. Because the puree added additional liquid, I also heated the mixture for longer, all while whisking.
To my horror, the berry-flavored custard was a beautiful pink, looking uncannily like Teletubby food. But that was all covered up by the fruit slices.
Oh, and throughout all of this I also somehow baked four loaves of sourdough.