Shanel Wu
They/them. PhD student: smart textiles, weaving, computational craft, hardware hacking.
German Short Row Analysis
by Shanel

While this post is being written in November 2020, I drew these diagrams way back in June 2019 (?!), and these images were posted on Instagram in December 2019.
I had the question that wouldn’t leave me alone, “Why do German short rows look neater than other kinds of short rows?” and the companion question, “How do they work?”. The second question probably answers the first one, too.

What are German short rows?
I’m writing this to a reader who is already familiar with German short rows, has worked them at least once, and has used at least one other short row technique (e.g. wrap & turn, yarn over, Japanese), so my answer to this question is more of a review. If you’re looking to learn the basics of what German short rows are and how to do them, I’ll link to tutorials like this one by Tin Can Knits.
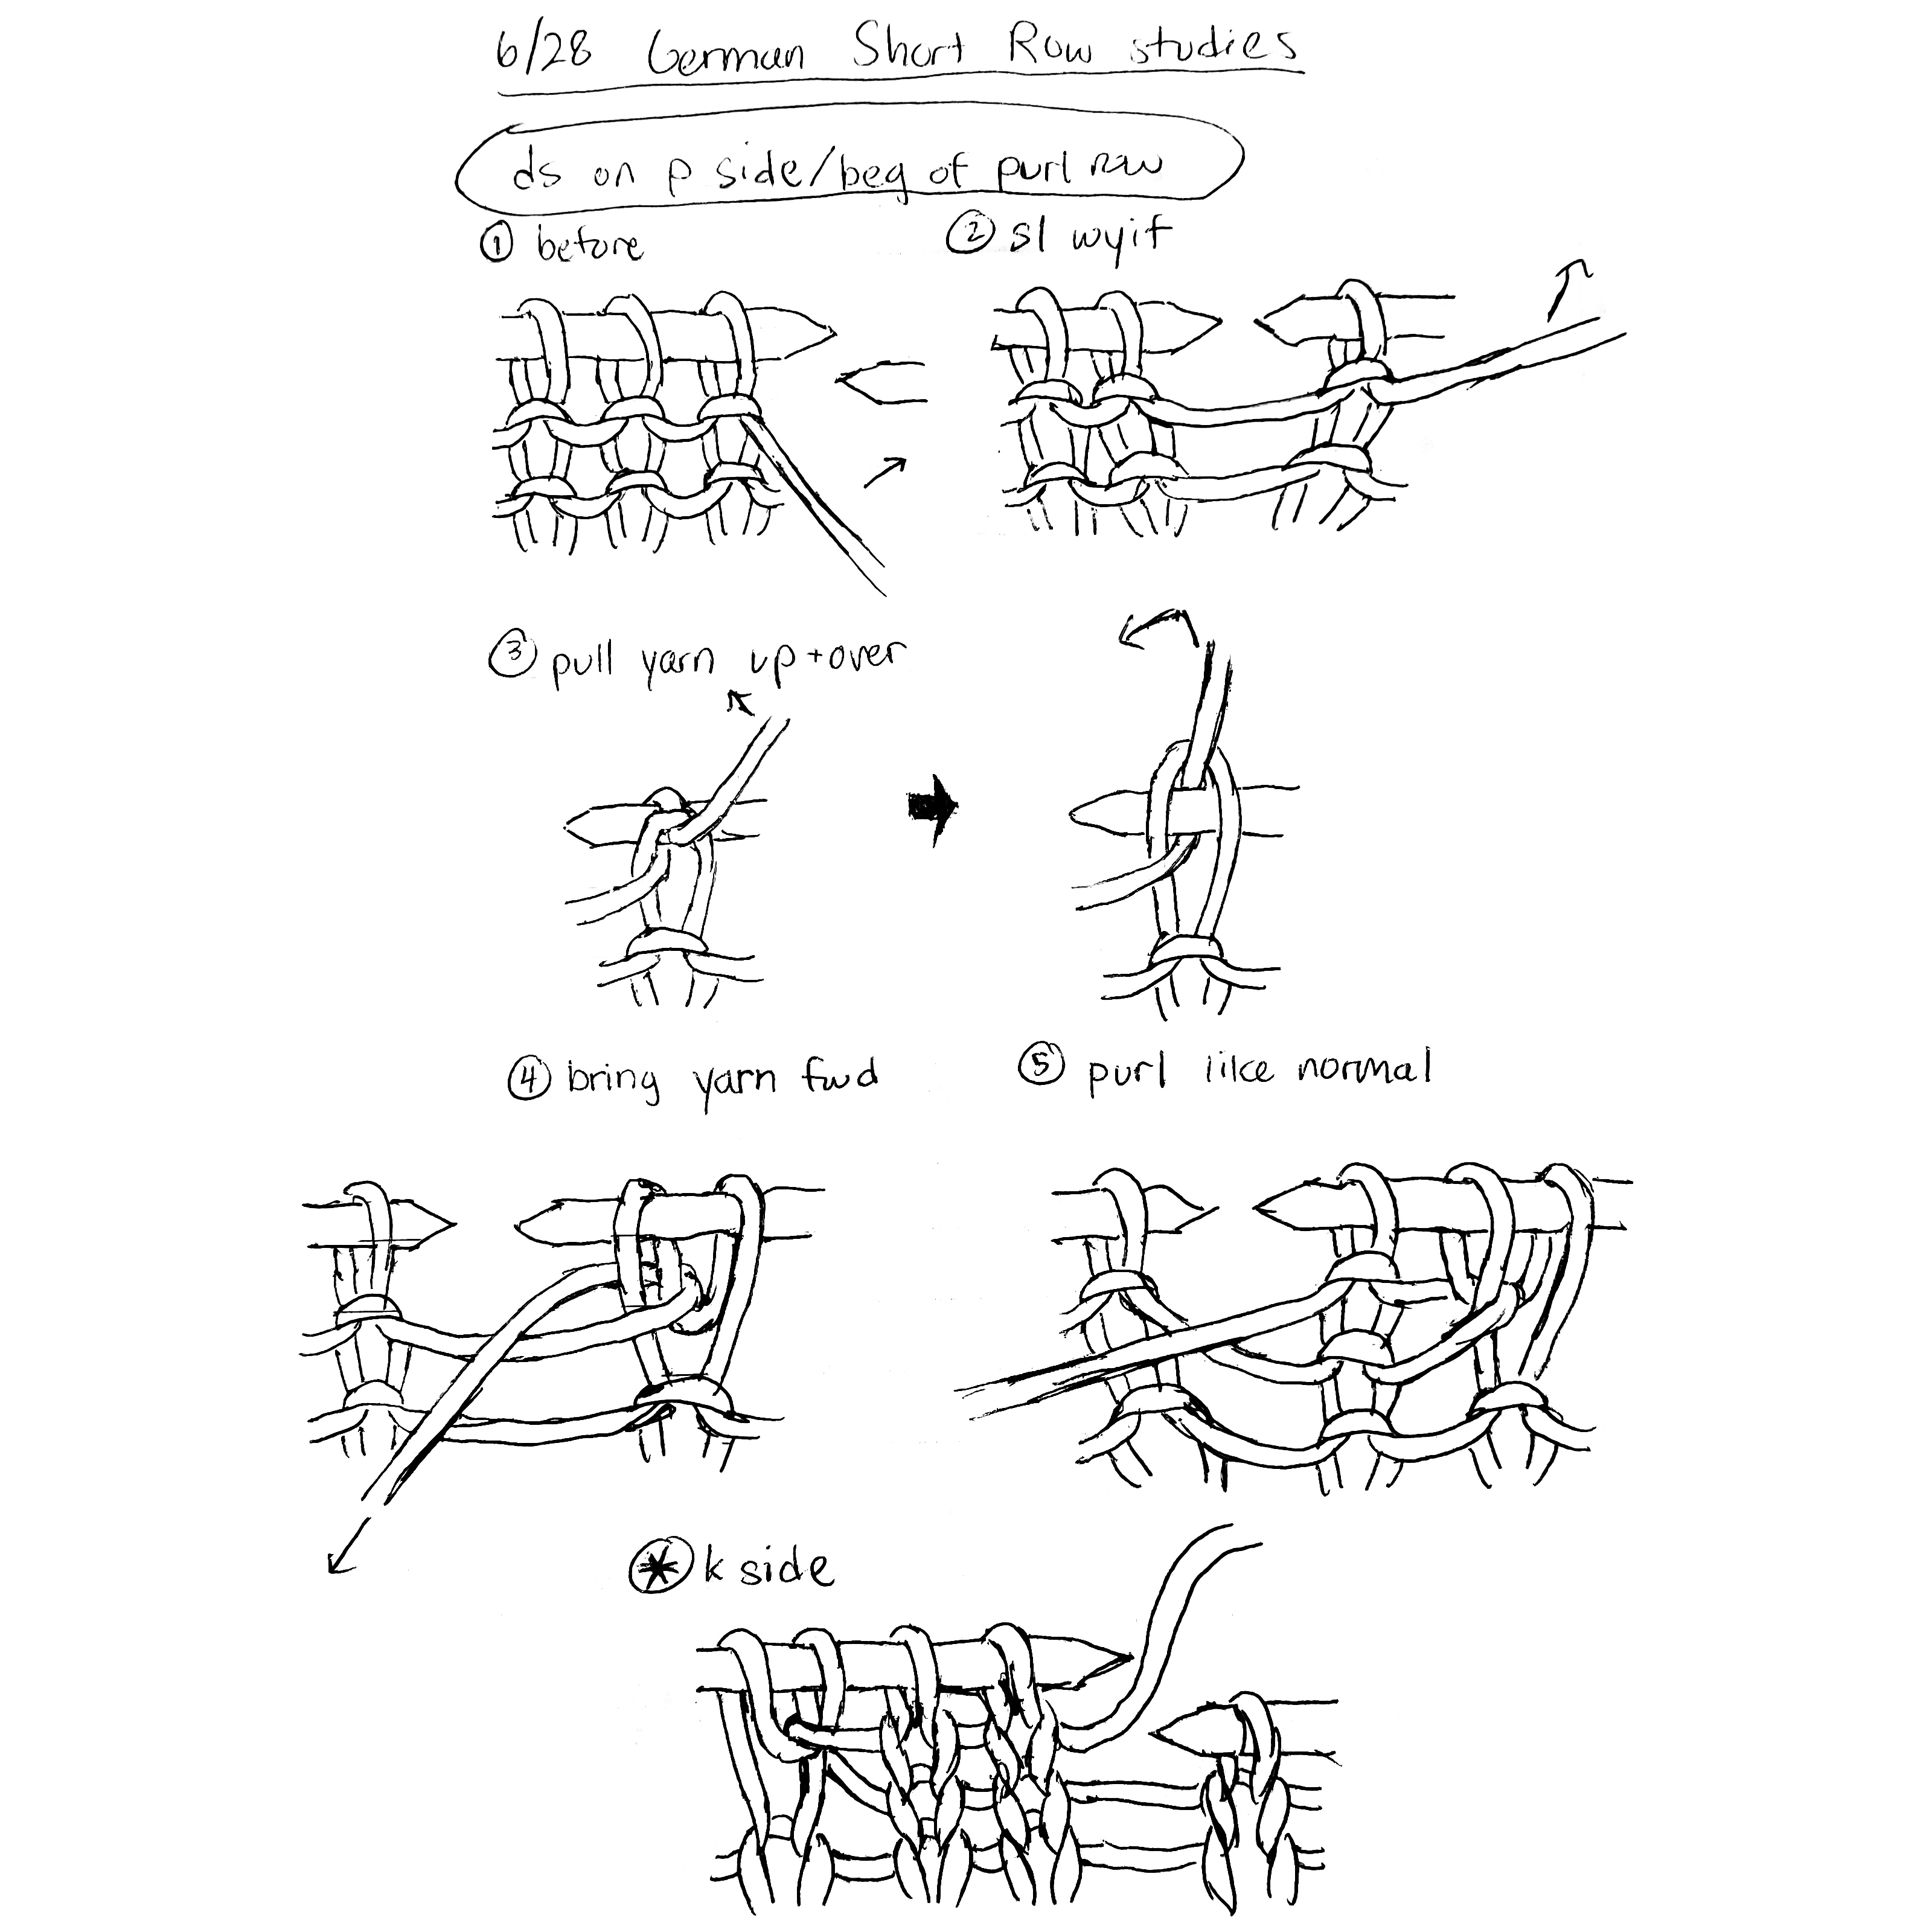
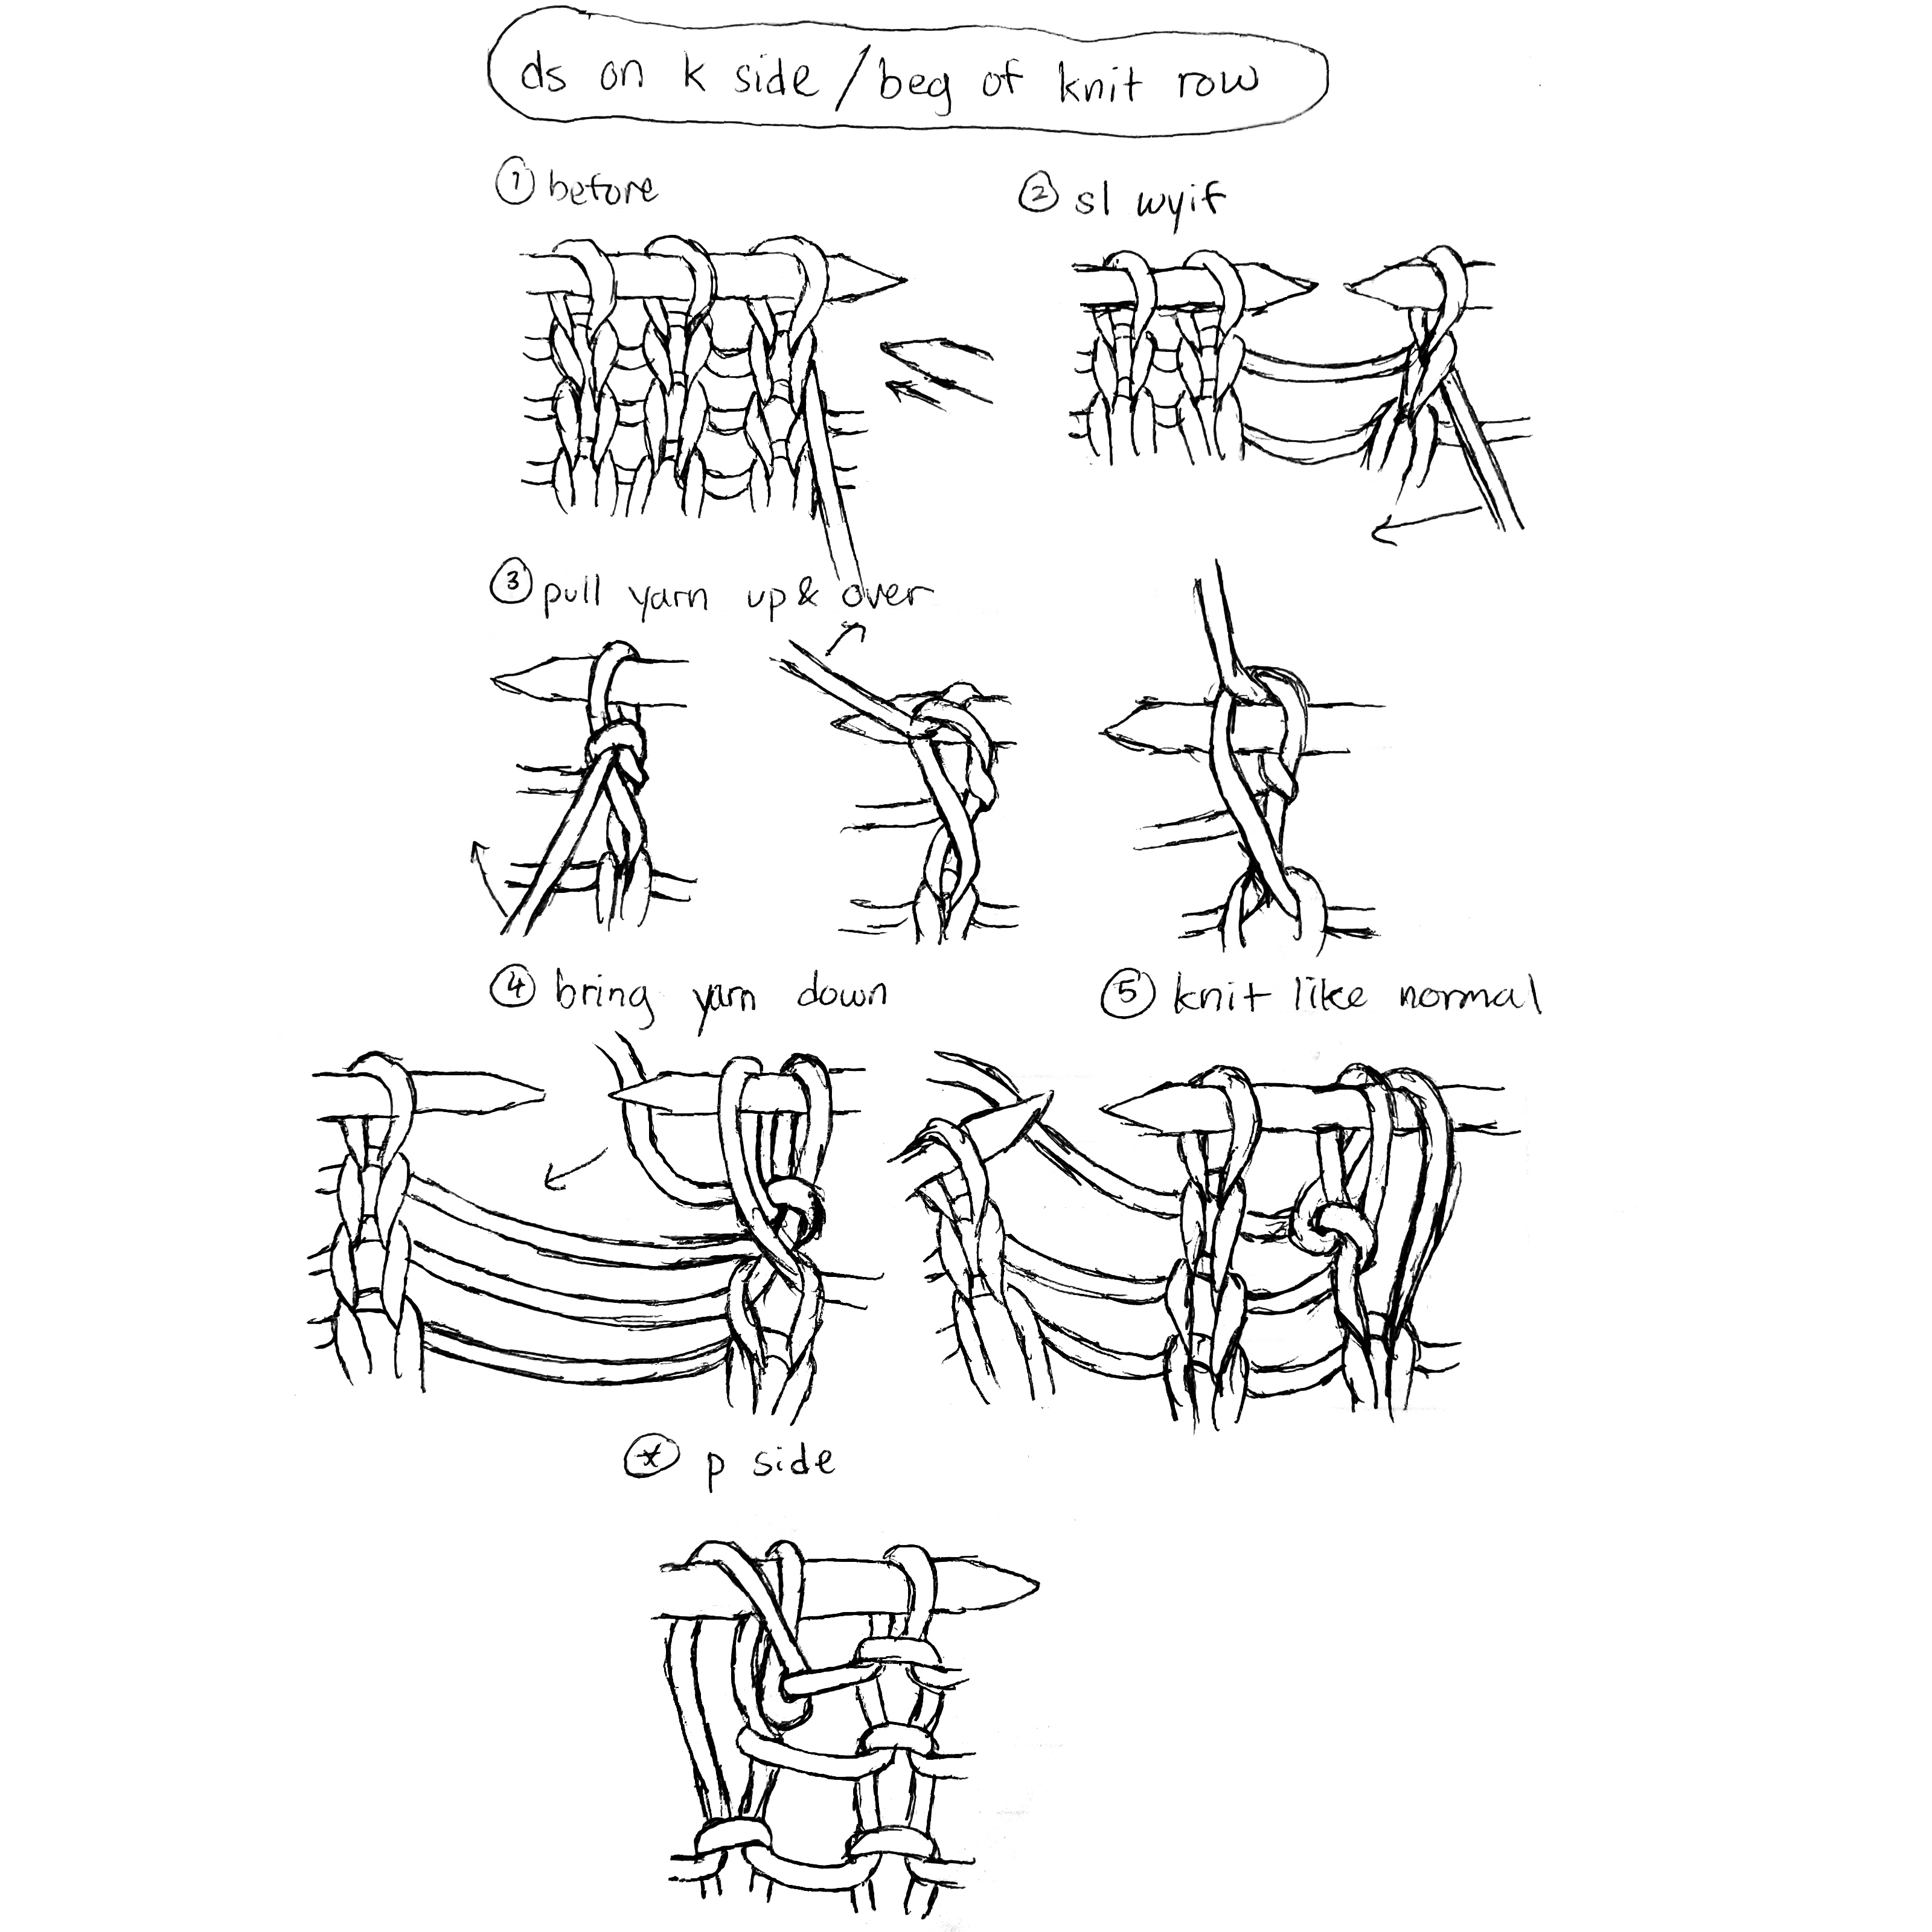
My main point of comparison was wrap and turn (W&T) short rows (Purl Soho). In comparison to that particular short row technique which creates “wraps” around the turn stitch, German short rows (which I’ll abbreviate as “GSR”) use a “double stitch” when turning. Double stitches are formed by working the turn stitch in a knit or purl depending on which side of the work they’re on, then turning the work, slipping the turn stitch, then pulling the working yarn up and over the turn stitch before working the rest of the row. Ignoring tension, this would theoretically use about the same amount of yarn as a W&T short row turn. However, yanking the yarn up and over the needle usually results in a tighter “turn” and less yarn in the turn stitch compared to a W&T.
How do GSR’s work?

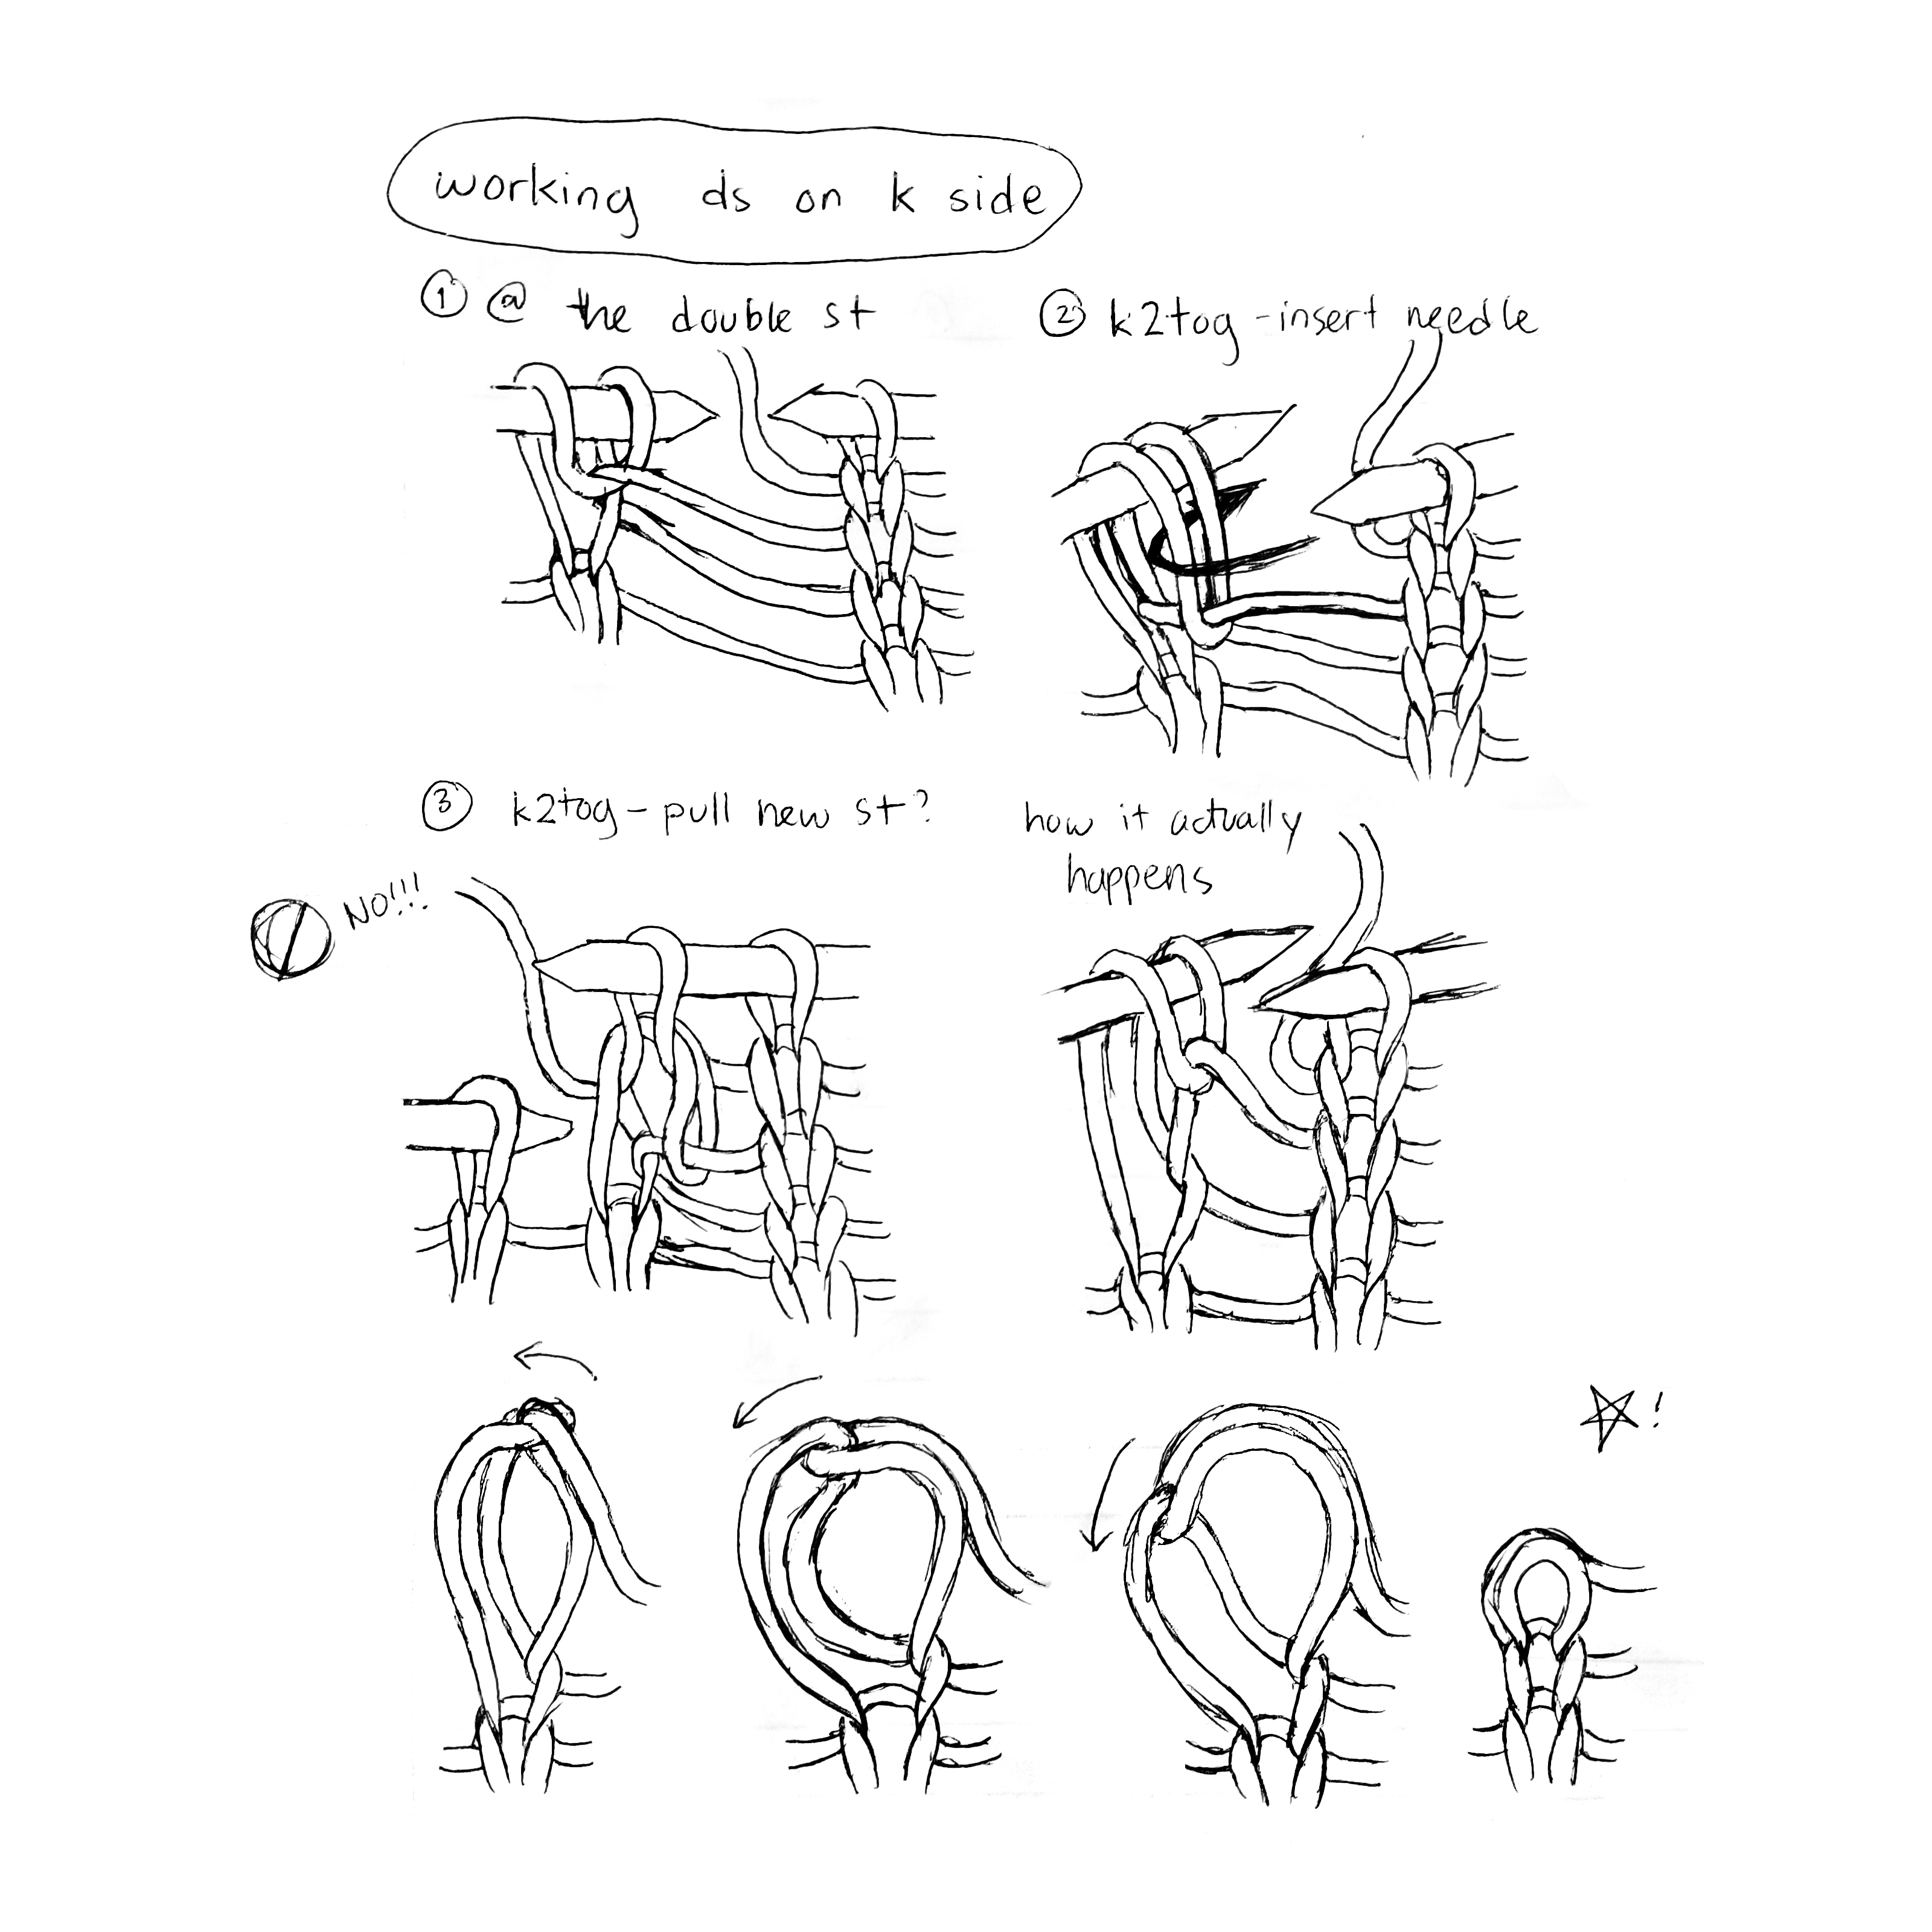
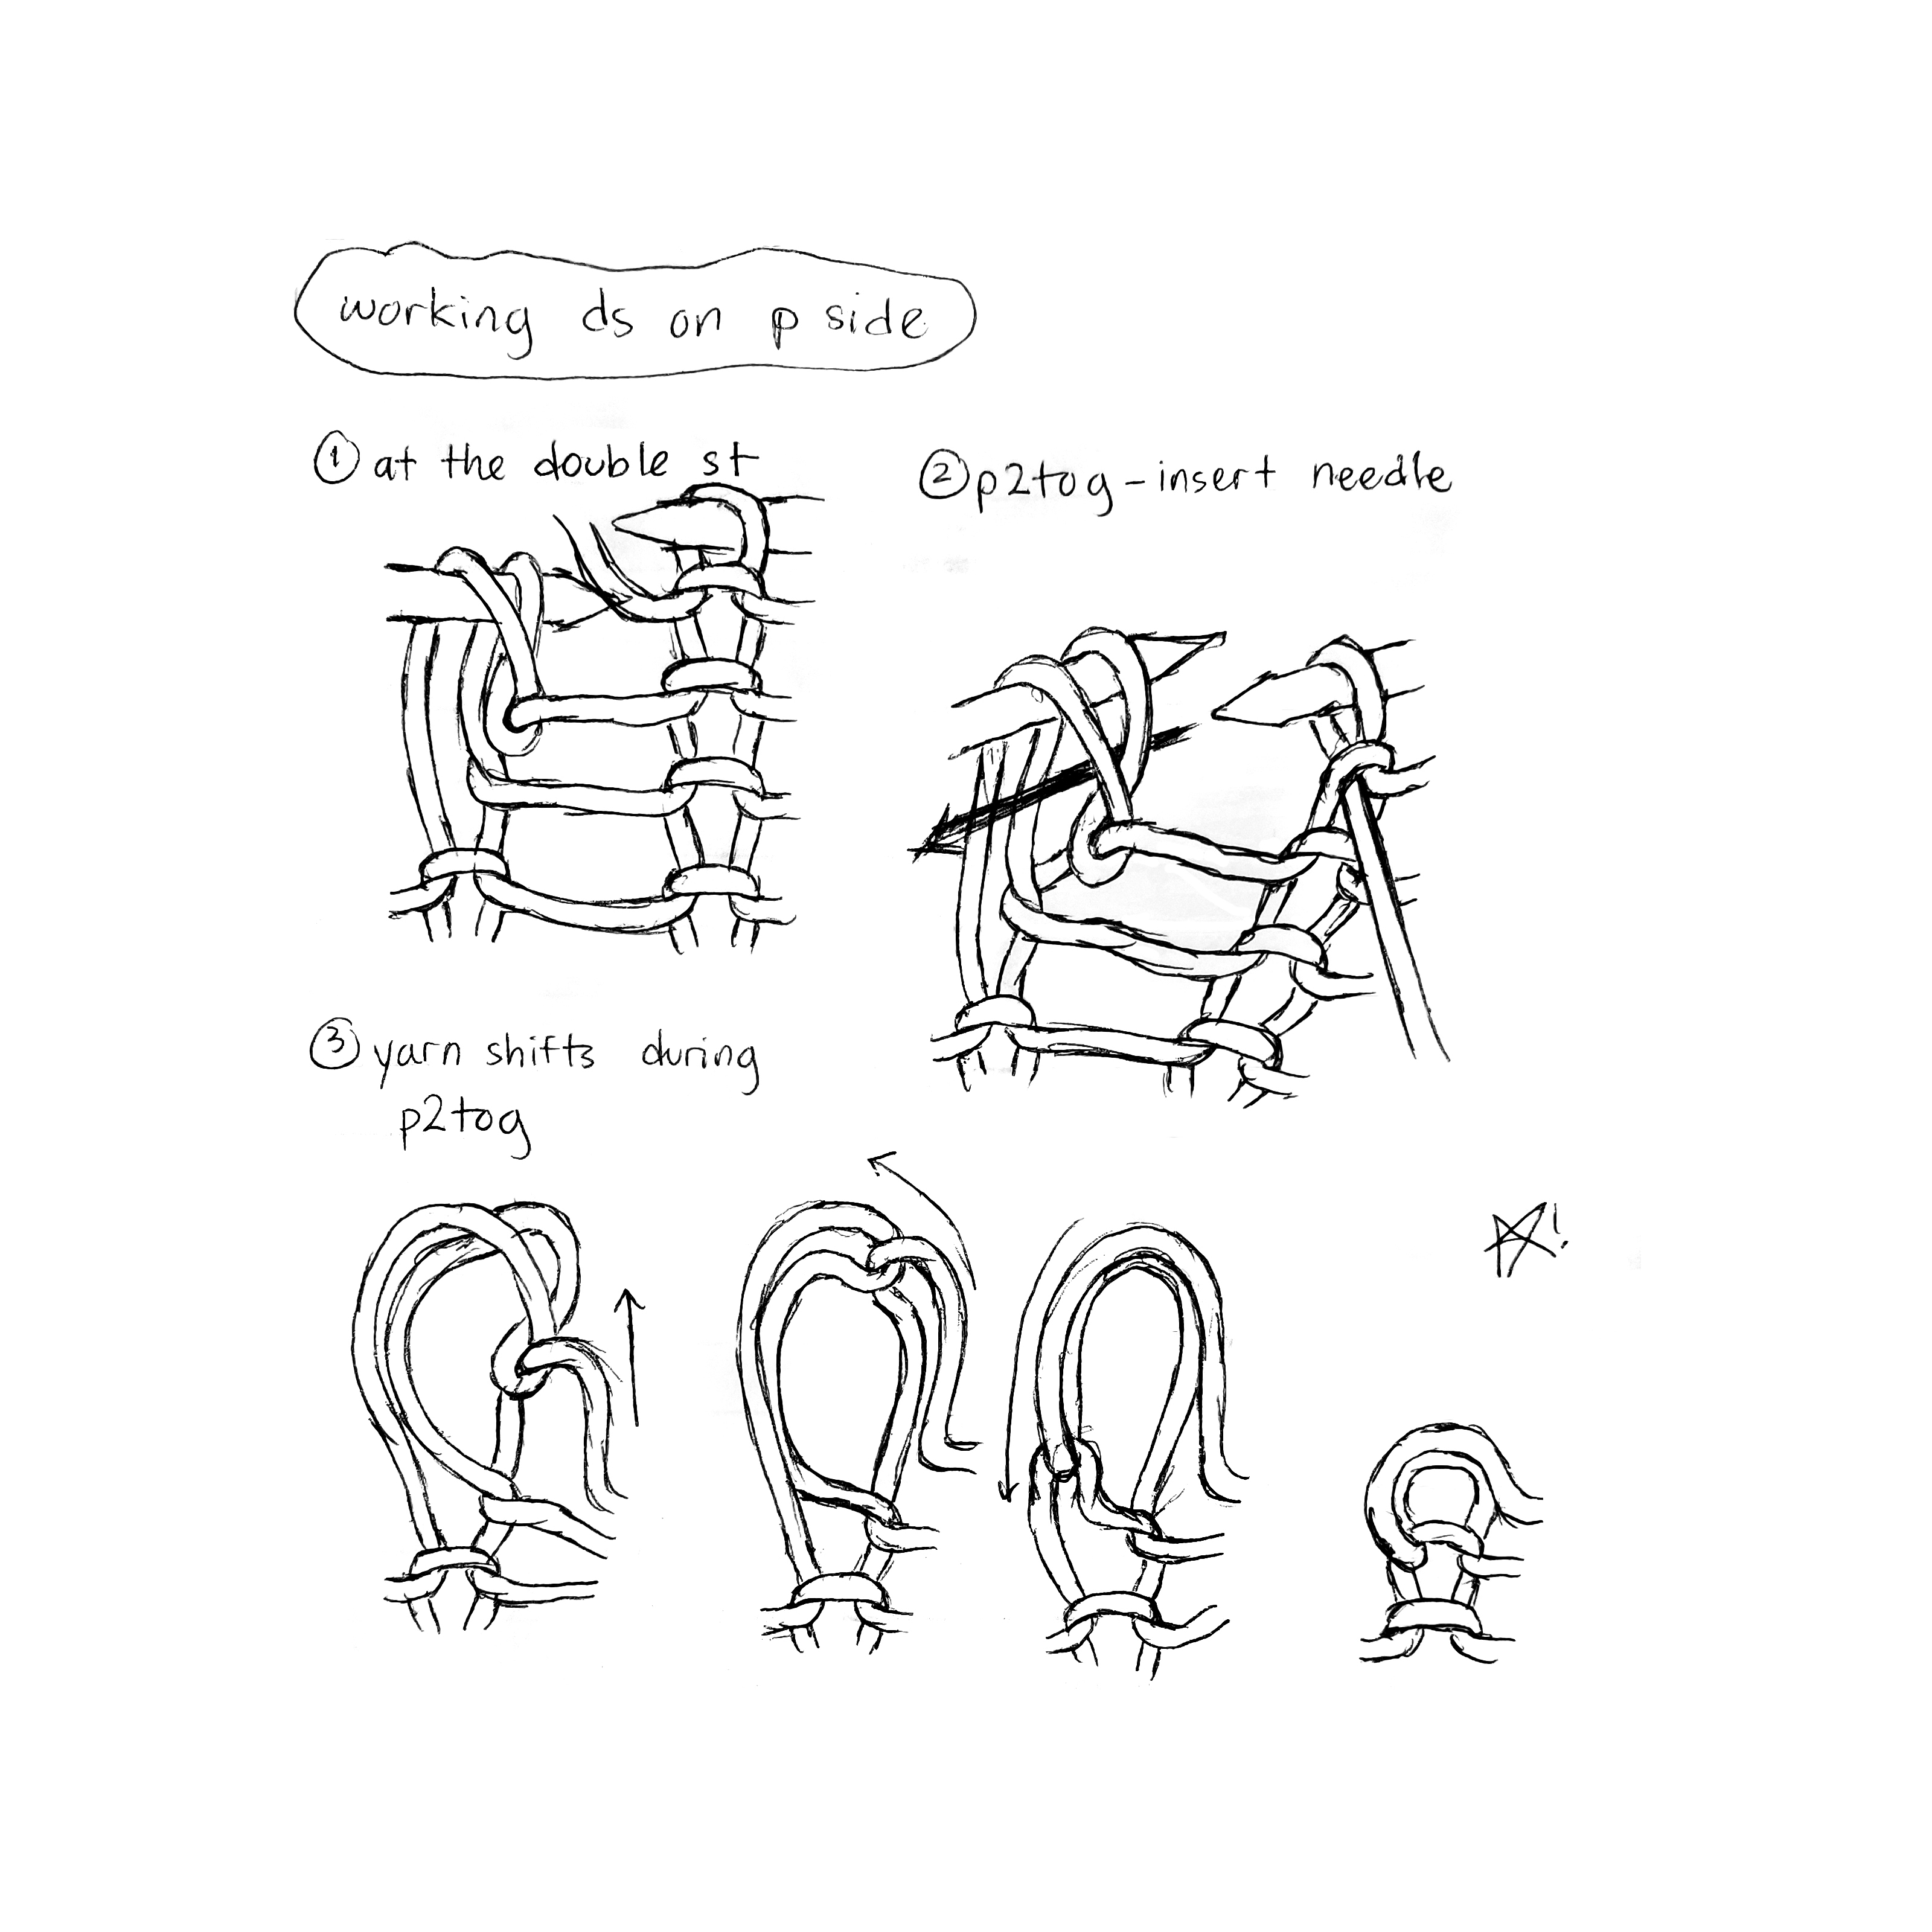
While I’ve done German short rows in several projects now, the motions of making double stitches and working them always seemed like arcane tricks to me. I could only glean so much visually and structurally by watching my own work or others’ YouTube videos, no matter how slowed down they were. I thought I could create an alternate view into the structure of the technique by hand-drawing a representation on paper. In creating these diagrams, I focused on the topological placement of the needles, the working yarn, and the yarn in the stitches. Drawing the yarn in its correct path took priority over accurately representing the spacing between different parts.
